 OpenWiring
#8. Terminal strips
#Terminals in the schematic
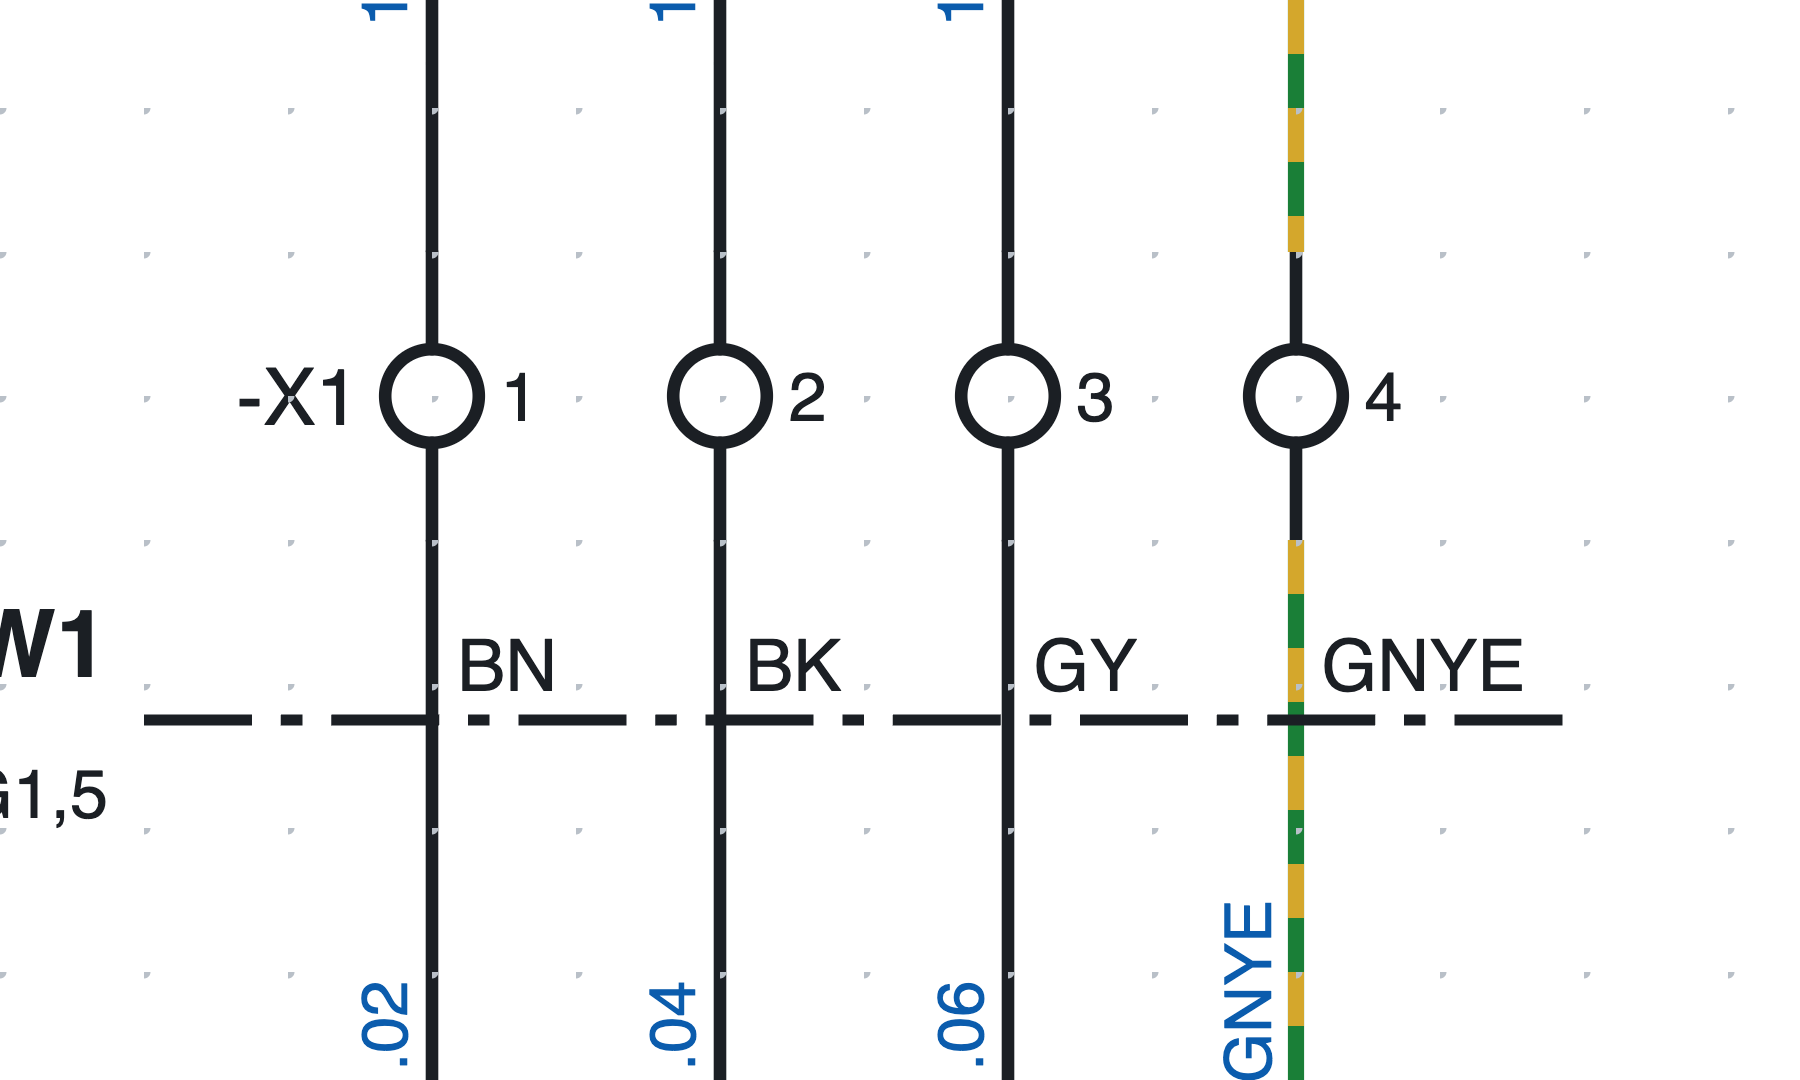
Terminals -X1:1…4 on page 1: the terminal strip tag appears only on the first of the row.
- In the library, category Terminals and connections, choose Terminal (or PE terminal, Disconnect terminal, Fuse terminal).
- Insert it on the wire: the wire is interrupted on both sides of the terminal.
- The terminal takes the tag
-X1:1; the next ones-X1:2,-X1:3…
The tag of a terminal is <terminal strip>:<number><level>:
- the terminal strip has a free name, even hierarchical like
X1.1.2; - the number follows the colon (
X1.1.2:3); - the level is a letter for multi-level terminals (
X1:1A,X1:1B).
On a vertical wire the terminal strip tag is on the left and the number on the right; on a horizontal wire (rotated symbol) the number is above and the tag below.
The wire number passes through the terminal without changing: the wires on both sides have the same number (see chapter 6).
#The terminal strip navigator
The Terminal strips tab shows the terminal strips of the project and their terminals in a table.
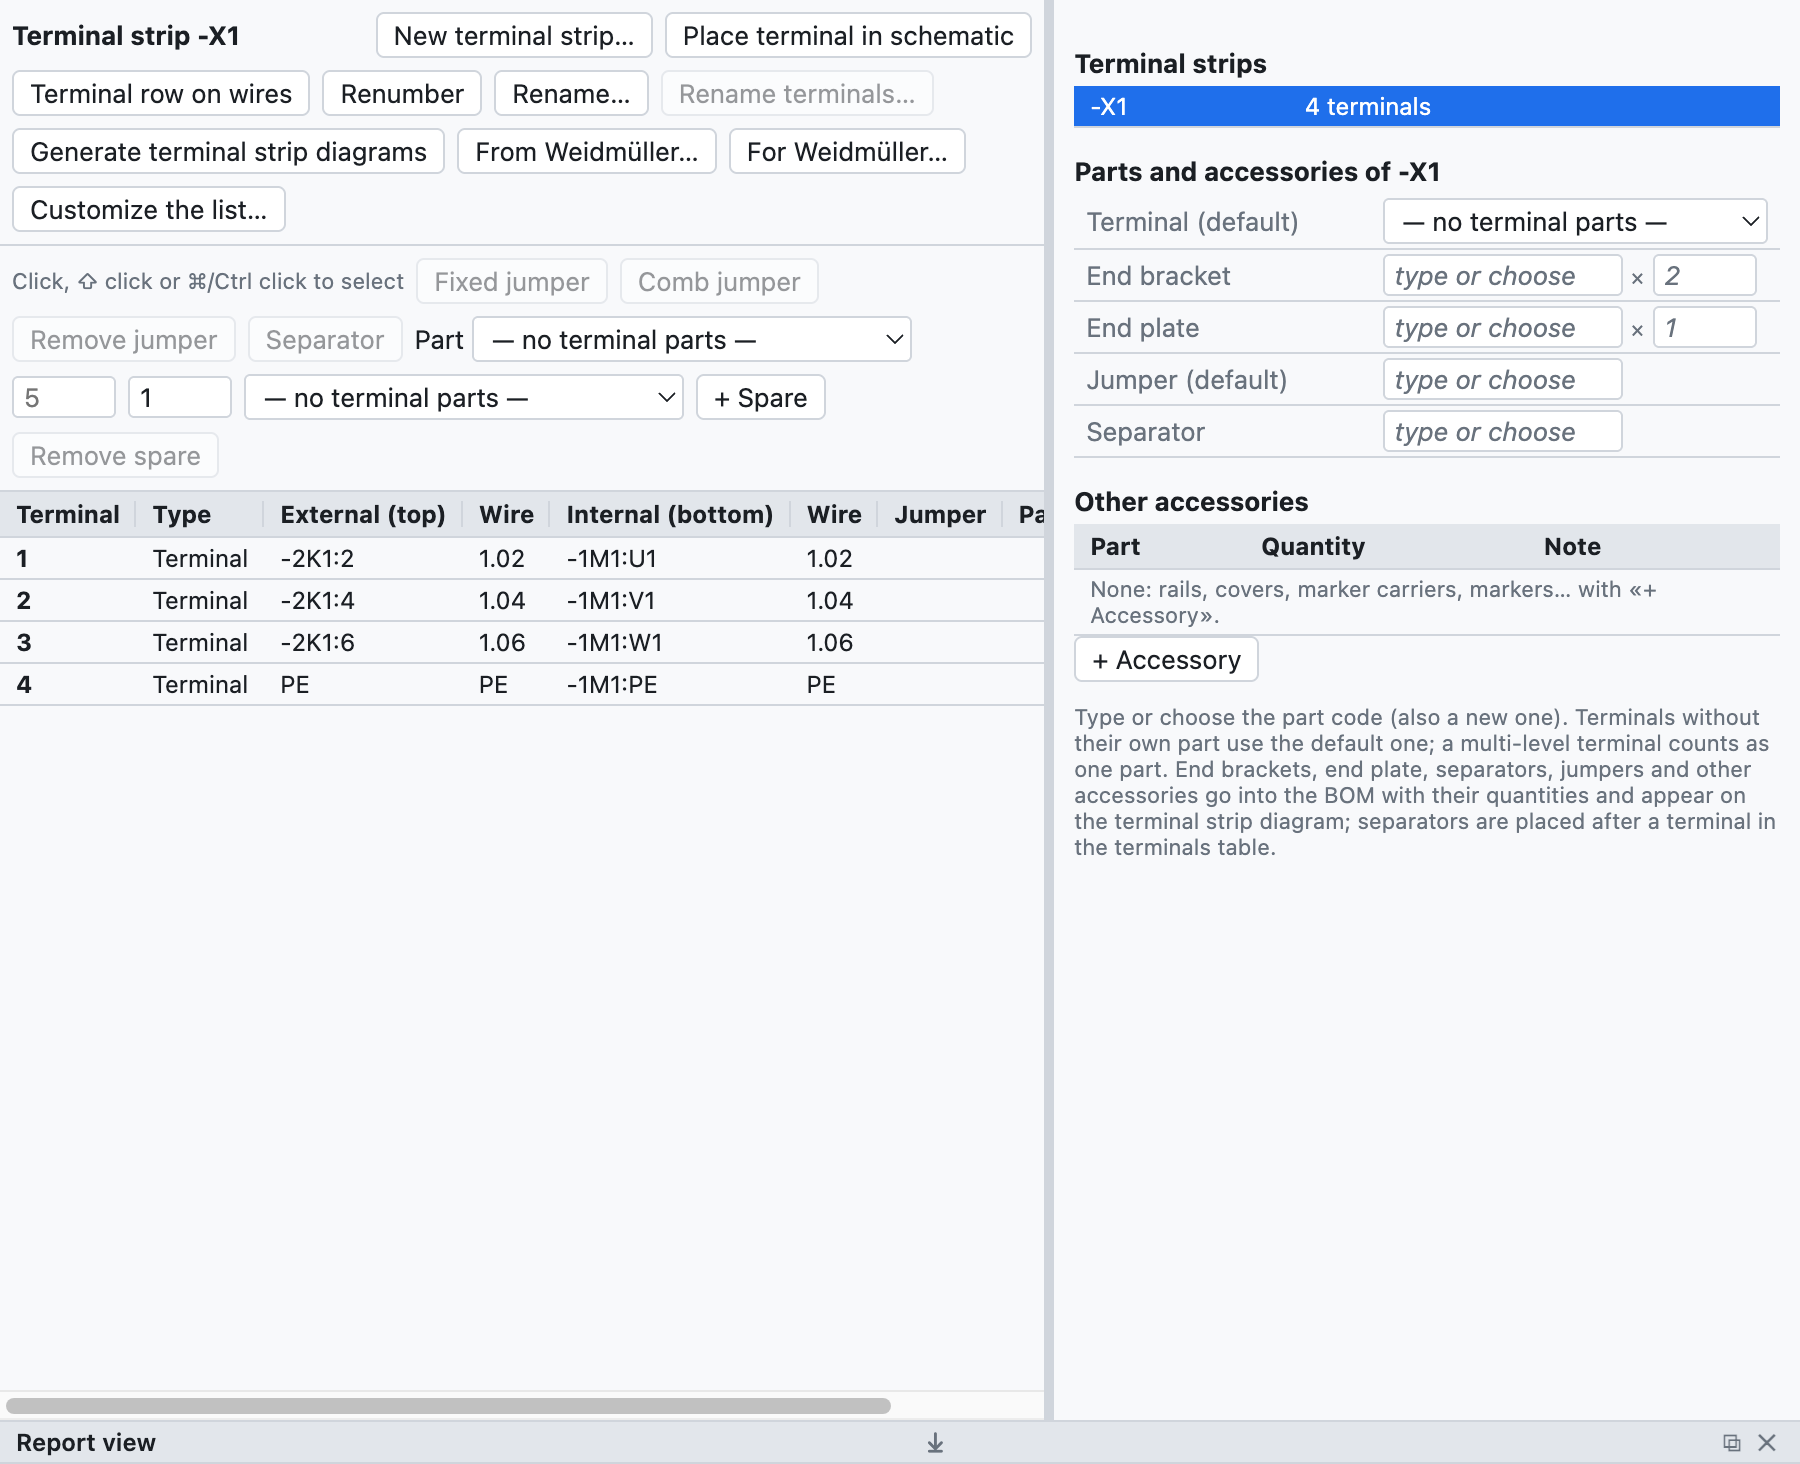
Terminal strip -X1 of the example project: external and internal destinations, wire numbers, parts and
accessories.
- On the right the list of the terminal strips of the project; a click opens one.
- In the centre the terminal table: number, type, external (top) and internal (bottom) destination, wire numbers, jumpers, part, clickable position.
- Terminals are selected with click, ⇧ click (range) and ⌘/Ctrl click (add).
#Multi-level terminals
A two- or three-level terminal has the same number and one letter per level.
- Select the terminal in the schematic, for example
-X1:1. - In the properties press Add level (also from the right-click menu): the terminal becomes
-X1:1Aand the program lets you insert-X1:1Bwith a click, even on another page. - The next clicks insert
1C,1D…
In the bill of materials a multi-level terminal counts as a single part (-X1:1A/B).
#Numbering and renaming
- A new terminal takes the number after the highest of the terminal strip; the others do not change.
- Renumber numbers from 1 in schematic order (page, then left to right and top to bottom): levels stay
together with their letter, spares go to the end, terminals with a non-numeric name (for example
PE) stay as they were. - Rename… changes the name of the terminal strip on all its terminals (
X1→X2.1).
#Jumpers
- Select two or more terminals in the table.
- Press Fixed jumper or Comb jumper.
Jumpers appear in the table, in the terminal list, in the connection list and in the terminal strip diagram; each one can have its own part. Remove jumper removes them.
#Spares and separators
- + Spare adds undrawn terminals at the end: they go into the list and the bill of materials. Remove spare removes them.
- Separator after a terminal: a separating plate, drawn as a thick line in the terminal strip diagram.
#Parts and accessories
In the Parts and accessories box of the terminal strip you choose:
| Field | Quantity in the bill of materials |
|---|---|
| Terminal (default) | one per physical terminal without its own part |
| End plate | 1 |
| End stop | 2 |
| Jumper (default) | one per jumper without its own part |
| Separator | one per separator |
Part ▸ assign to selected gives a different part to single terminals (for example the disconnect terminals). Everything goes into the bill of materials and the purchase list automatically.
#Terminal strip diagram
Generate terminal strip diagrams creates one page per terminal strip (more sheets beyond 40 terminals) with destinations, wire numbers, jumpers, separators, spares and clickable positions, also in the PDF.
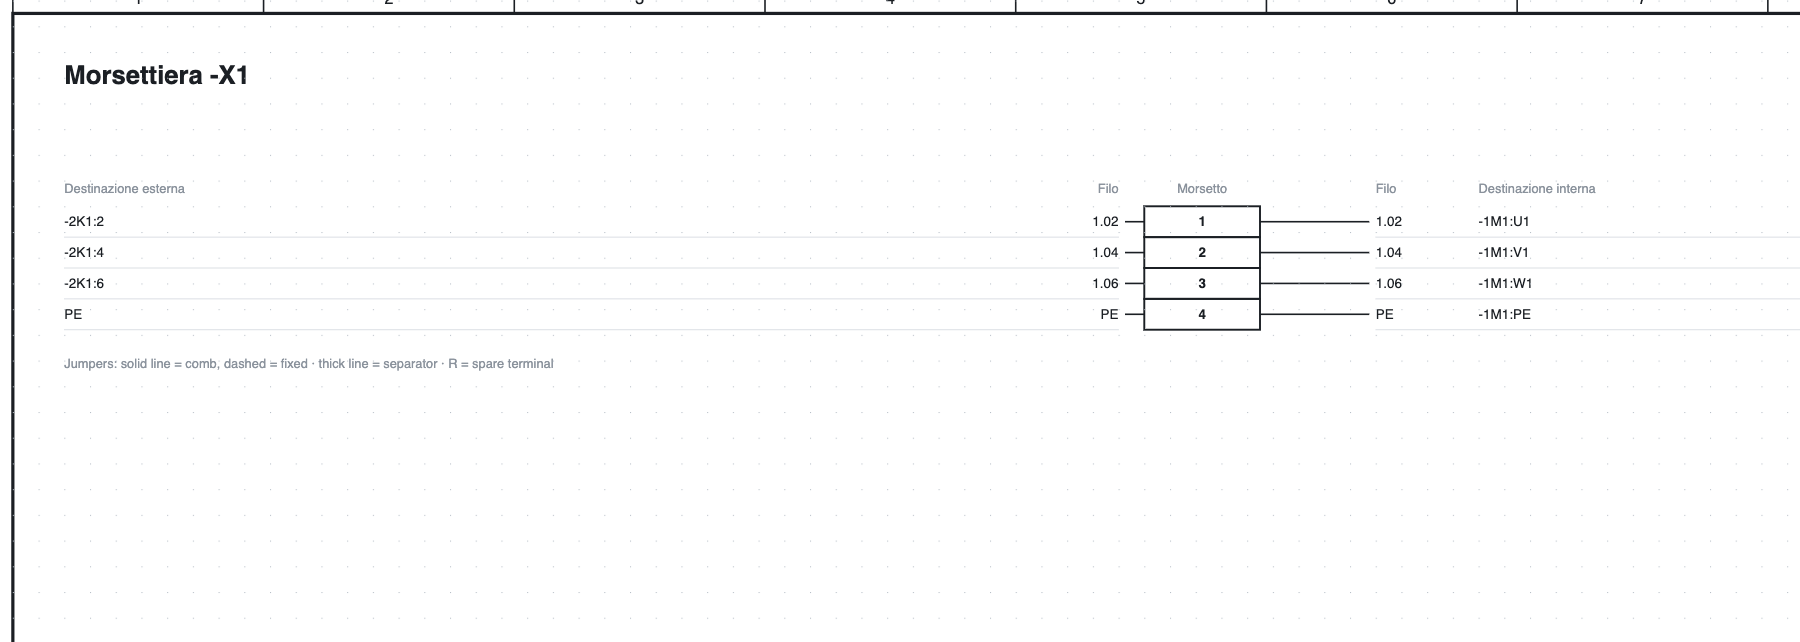
The top part of the terminal strip diagram of -X1.
The page updates by itself when you change the schematic; generating it again adds the pages of new terminal strips and removes those that have disappeared.
#Checks
The check reports duplicate terminals, terminals with a free side and data of terminal strips that no longer exist.
Edit this page on GitHub · OpenWiring 2.0.6 · GPL-3.0