 OpenWiring
#6. Tags, cross-references and wire numbers
#Device tags
Every device has a tag according to IEC 81346: a hyphen, the page number, the letter of the device
type and a sequential number. -2K1 is the first contactor on page 2.
| Letter | Devices |
|---|---|
| K | relays, contactors, timed coils |
| Q | three-pole circuit breakers, motor protection switches, disconnectors |
| F | fuses, 1P and 2P circuit breakers, thermal overload relays |
| S | pushbuttons, emergency stops, selector switches |
| B | sensors, limit switches |
| P | indicator lamps |
| M | motors, solenoid valves |
| T | transformers, power supplies |
| A | PLCs, cards, network nodes, complex devices |
| U | inverters |
| E | generic loads (single-line) |
| X | terminal strips and connectors |
| W | cables |
The letter depends on the symbol; the tag can always be changed by hand in the properties.
#The tag template
In Project properties ▸ Device tags you choose how the tag is built:
| Placeholder | Meaning | Example |
|---|---|---|
{pagina} |
page number | 200 |
{colonna} |
column (1–10) of the device | 4 |
{lettera} |
IEC 81346 letter | K |
{n} |
sequential number | 1 |
{n:2} |
two-digit sequential number | 01 |
| Template | Result on page 200 |
|---|---|
{pagina}{lettera}{n} (default) |
-200K1 |
{lettera}{n} |
-K1 |
{pagina}{lettera}{n:2} |
-200K01 |
{pagina}.{colonna}{lettera} |
-200.4K |
- Counter: restarts on every page or is unique in the whole project.
- Stable tags: a new device takes the number after the highest on the page (
-2K3after-2K2) and the others do not change. - Renumber devices (Project ▸ Renumber devices…) renumbers everything in page, column and row order. Contacts follow their coil; terminals have their own numbering.
#Full tag: function and location
With the function (=, the plant or machine section) and the location (+, the cabinet or
pushbutton station) filled in, the tag becomes complete: =A1+Q1-2K1. They are filled in the device
properties or, for many devices at once, in the navigator (chapter 7).
#Coils and contacts
The main device (the coil of a relay or contactor) and its contacts have the same tag. The program links them by itself:
- Insert the coil: it gets, for example,
-2K1. - Insert the contacts: a window asks which device? and lists the project's coils and devices, those with the same letter first. Choose from the list or type a new tag; from the next contact on, the window suggests the last coil chosen.
- To assign a contact to another coil, type the tag in the contact properties: the list suggests the existing tags with the same letter.
#Contact numbering (EN 50005)
Auxiliary contacts are numbered automatically with the sequence digit and the function digit: the first NO
is 13-14, the second 23-24, the first NC 31-32 and so on. It can be turned off for a single contact and
the terminals typed by hand (Properties ▸ Connection points). Power contacts are 1-2, 3-4, 5-6.
#Cross-references
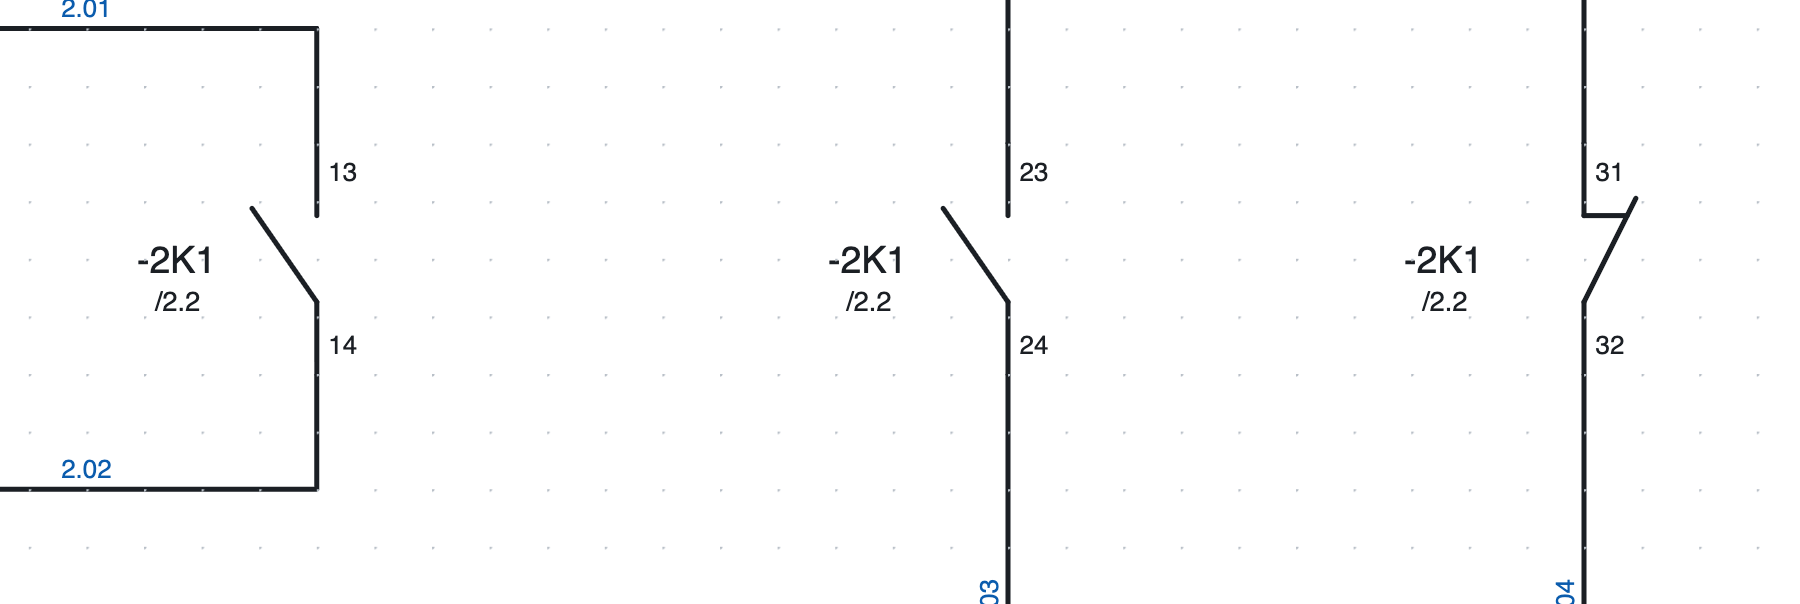
Below each -2K1 contact there is /2.2: the coil is on page 2, column 2.
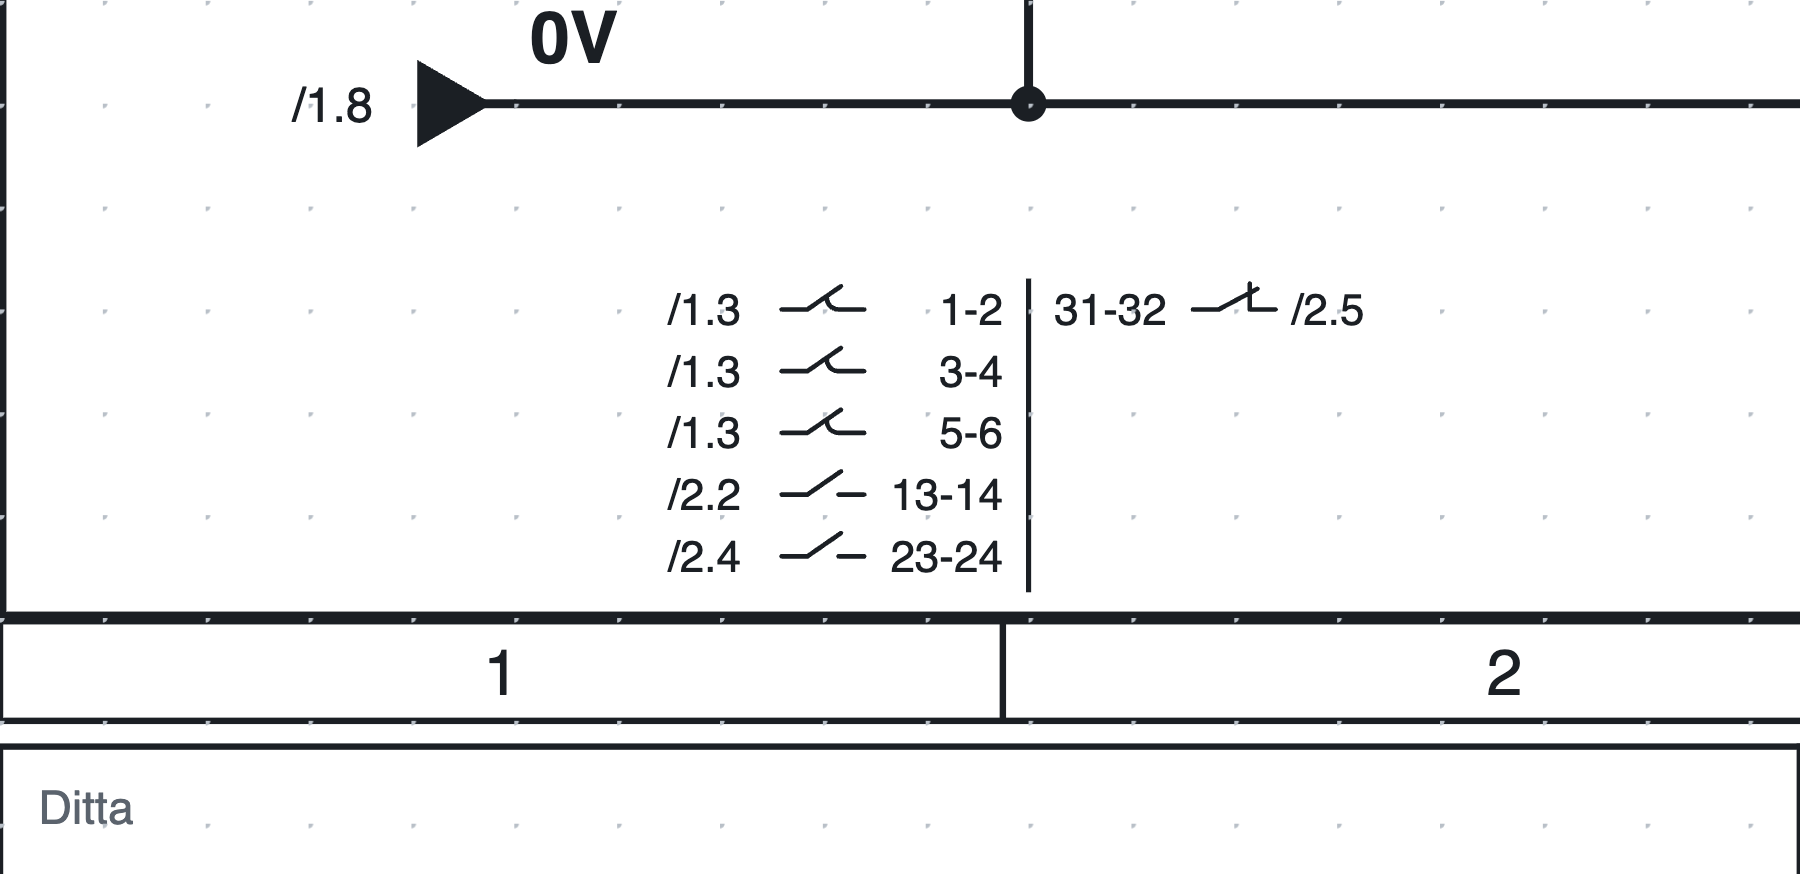
The contact image of -2K1 at the bottom of page 2: power and NO contacts to the left of the line, NC to the
right, each with its position.
- Below each contact appears the position of the coil (
/2.2). - Below the coil appears the contact image: all its contacts with their terminals and position. It is placed at the bottom of the page, below the lower rail, on the vertical of the coil; or else below the symbol (Project properties ▸ Device tags ▸ Coil contacts).
- Every cross-reference is clickable: it takes you to the page and selects the element. In the PDF it becomes a link.
- Right-clicking a coil offers Go to contact…, on a contact Go to the main element.
The check reports contacts without a coil and more contacts than the part has (for example a fifth contact on a contactor with 4 auxiliaries).
#Paired cross-references
A contact can also be shown on another page without duplicating it, for example an auxiliary contact of a circuit breaker on the overview page: right-click the contact ▸ Draw a representation (paired cross-reference)…, then click where it should be drawn.
You can also start from the main element: right-click the coil or the motor protector ▸ Draw a representation of a contact… (or Representation… on the Symbol tab) lists its contacts already placed in the schematic, auxiliaries first: choose the one to draw and click where it goes.
- The representation is drawing only: it does not count as a contact, does not connect to wires and does not appear in the reports or in the bill of materials. Tag and terminals always follow the real contact.
- The real contact and the representation point to each other with cross-references, in both directions.
- Properties ▸ Representation of shows the real contact (one click takes you there); Make it a real contact turns it into a contact with its own connections.
- If the real contact is deleted, the check reports the orphaned representation and offers to delete it.
#Device properties
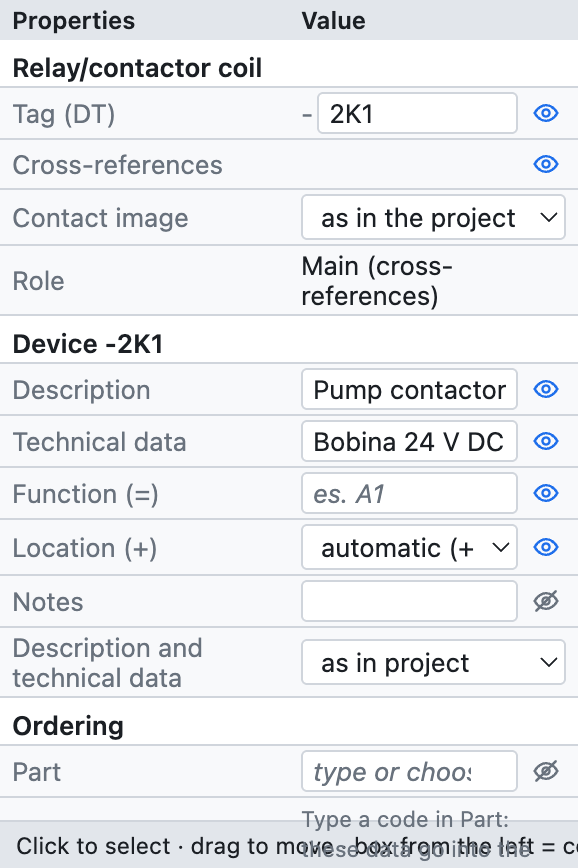
The properties of coil -2K1 in the example project.
| Group | Fields |
|---|---|
| (symbol name) | tag, role (main, contact, device, terminal…) |
| Device | description, technical data, function (=), location (+), notes, texts on the schematic |
| Ordering | part, manufacturer, type, order number |
| Connection points | the name of each terminal (A1, A2, 13, 14…) |
| Position | X and Y in mm, rotation, mirrored |
| Wire number | whether the wire number passes through the element |
The data of the Device and Ordering groups apply to the whole device: written on the coil, they also apply to the contacts. If a part is assigned, empty fields show its data in grey.
#Wire numbers
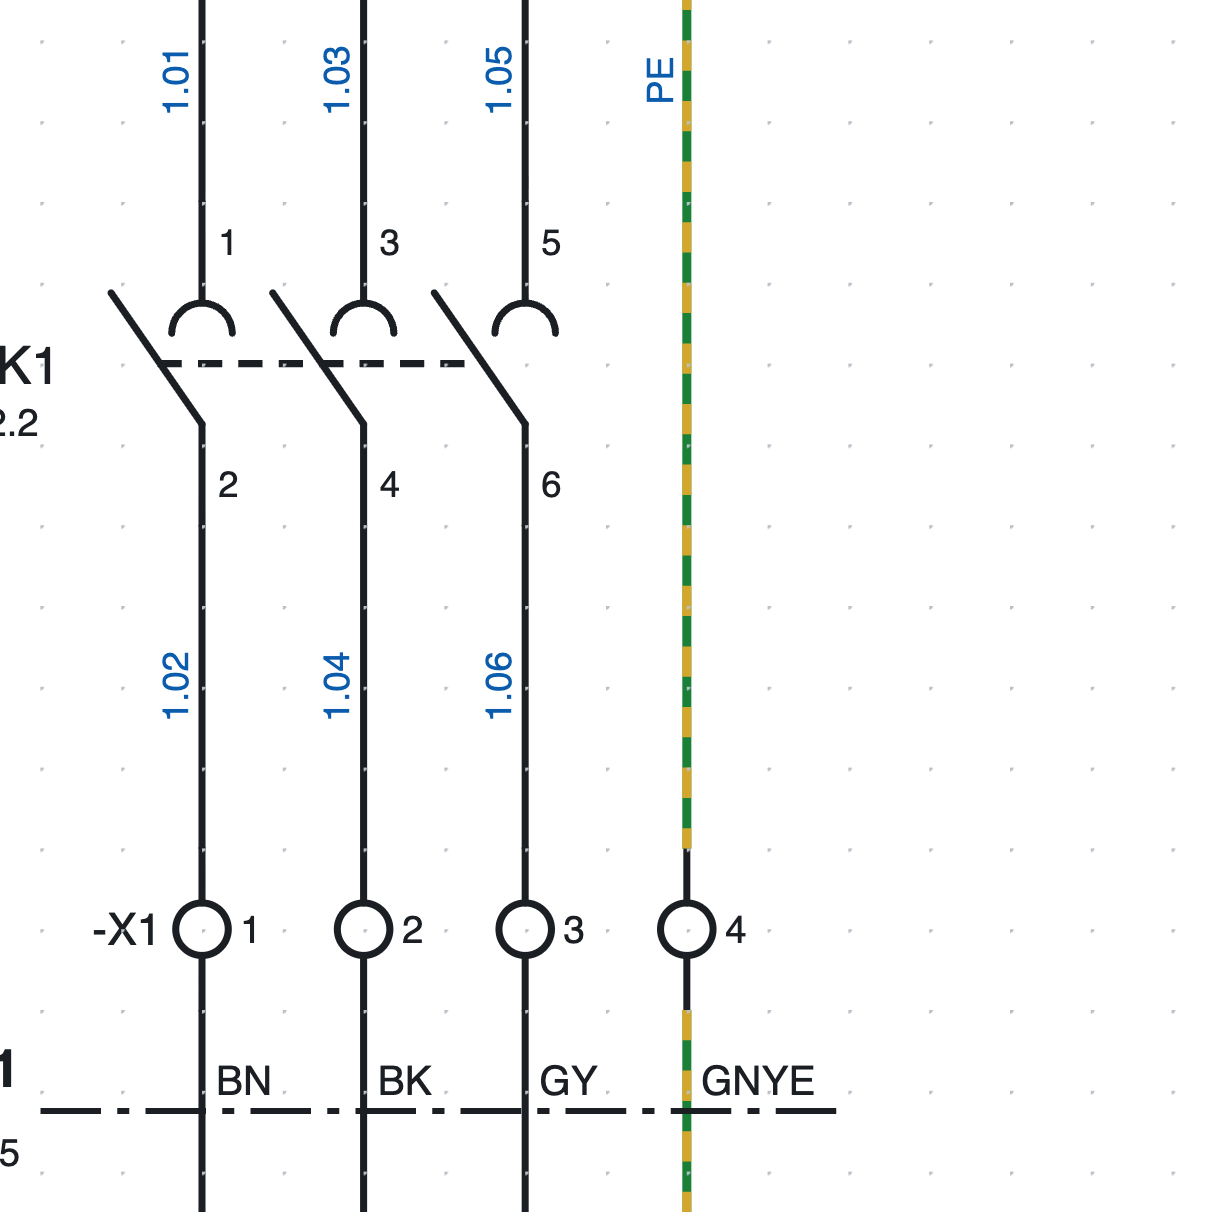
Wire numbers on page 1: 1.01, 1.03… above the contactor, the same numbers below, because terminals -X1
do not change the number.
Every conductor (all the wires connected to each other up to the connection points of the components)
has a number, written on each of its segments. The default template is {pagina}.{n:2}: 200.01, 200.02…
#Locked or recalculated numbering
In Project properties ▸ Wire numbers ▸ Numbering:
- locked (default): a numbered conductor keeps its number; a new conductor takes the first free number of the page, even if you draw it in the middle; when you join two numbered conductors one number remains, when you split one the new part gets a new number. Renumber wires recalculates everything in column order.
- recalculated: numbers are recalculated at every change, always in order.
#Manual number
Select a wire and type the number in Properties ▸ Wire number: it applies to the whole conductor. Deleting it returns to the automatic number.
#Where it is written
The number is written at a free spot on the wire: if there is a crossing, a component, a tag or another number in the middle of the segment, it moves along the wire or to the other side. This applies on screen, in the PDF and in the DXF. Show (project properties) hides them completely.
#Moving or repeating the number
Drag the number wherever you want, even away from the wire: from then on it stays there and follows the wire when you move it. Right-click on the wire:
- Add the wire number here: another number on the same wire, next to the clicked segment;
- Remove this wire number (clicking on a number, when there is more than one);
- Wire number in automatic position: back to the position chosen by the program.
#The wire number passes through terminals
A terminal is only a feed-through point: the wires on its two sides have the same number. Every element with two or more connection points has the checkbox The wire number passes through in Properties ▸ Wire number:
- checked by default on terminals, unchecked on the other components;
- it can be changed on a single element, for example to let the number pass through a disconnector.
The two sides remain separate conductors for the terminal list and the connection list.
#Advanced counter
In Project properties ▸ Wire numbers:
- Pattern: besides
{pagina}(page),{colonna}(column) and{n}you can use{quadro}(code of the page's cabinet),{n:2}(at least 2 digits:01) and{n:A}or{n:a}(counter in letters:A,B…Z,AA). Example:{quadro}.{n:A}givesQ1.A,Q1.B… Device tags accept{quadro}too. - Counter: restarts on each page, restarts for each cabinet, or unique in the project.
- Reserve per page: numbers left free after each page. With a reserve of 3, page 1 uses 1 and 2 and page 2 starts at 6: a wire added later to page 1 gets 3 and the following pages keep their numbers. When the reserve runs out, the counter skips the numbers already used by the following pages.
- Order on the page: by columns (left to right) or by rows (top to bottom).
Numbers written by hand, those of interruption points and PLC channel names are fixed: the counter skips them even when they are written on another page.
#Wire cross-section and colour
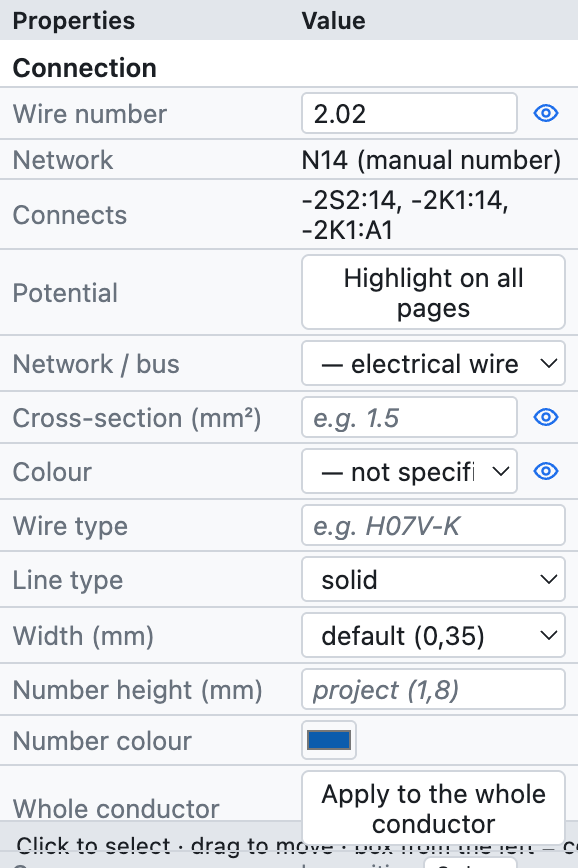
The properties of a wire: number, network, connections, potential, cross-section and colour.
- Cross-section in mm² (
1,5,2,5,6…) and colour with the IEC 60757 codes:BKblack,BNbrown,GYgrey,BUblue,DBUdark blue,RDred,WHwhite,GNYEgreen-yellow… - The colour chosen on one segment applies to the whole conductor, also after an interruption point or a terminal.
- With Coloured wires (project properties) the wire is drawn in its colour; PE is dashed green-yellow.
- The cross-section can change along the conductor (feed at 6 mm², branch at 1.5 mm²); Apply to the whole conductor copies cross-section and colour to all segments.
- With Cross-section and colour turned on, they are written next to the number (
200.01 1,5 mm² BU).
#Highlighting a potential
To follow a conductor through the whole project: select a wire and press Highlight on all pages in the properties (or right click ▸ Highlight potential).
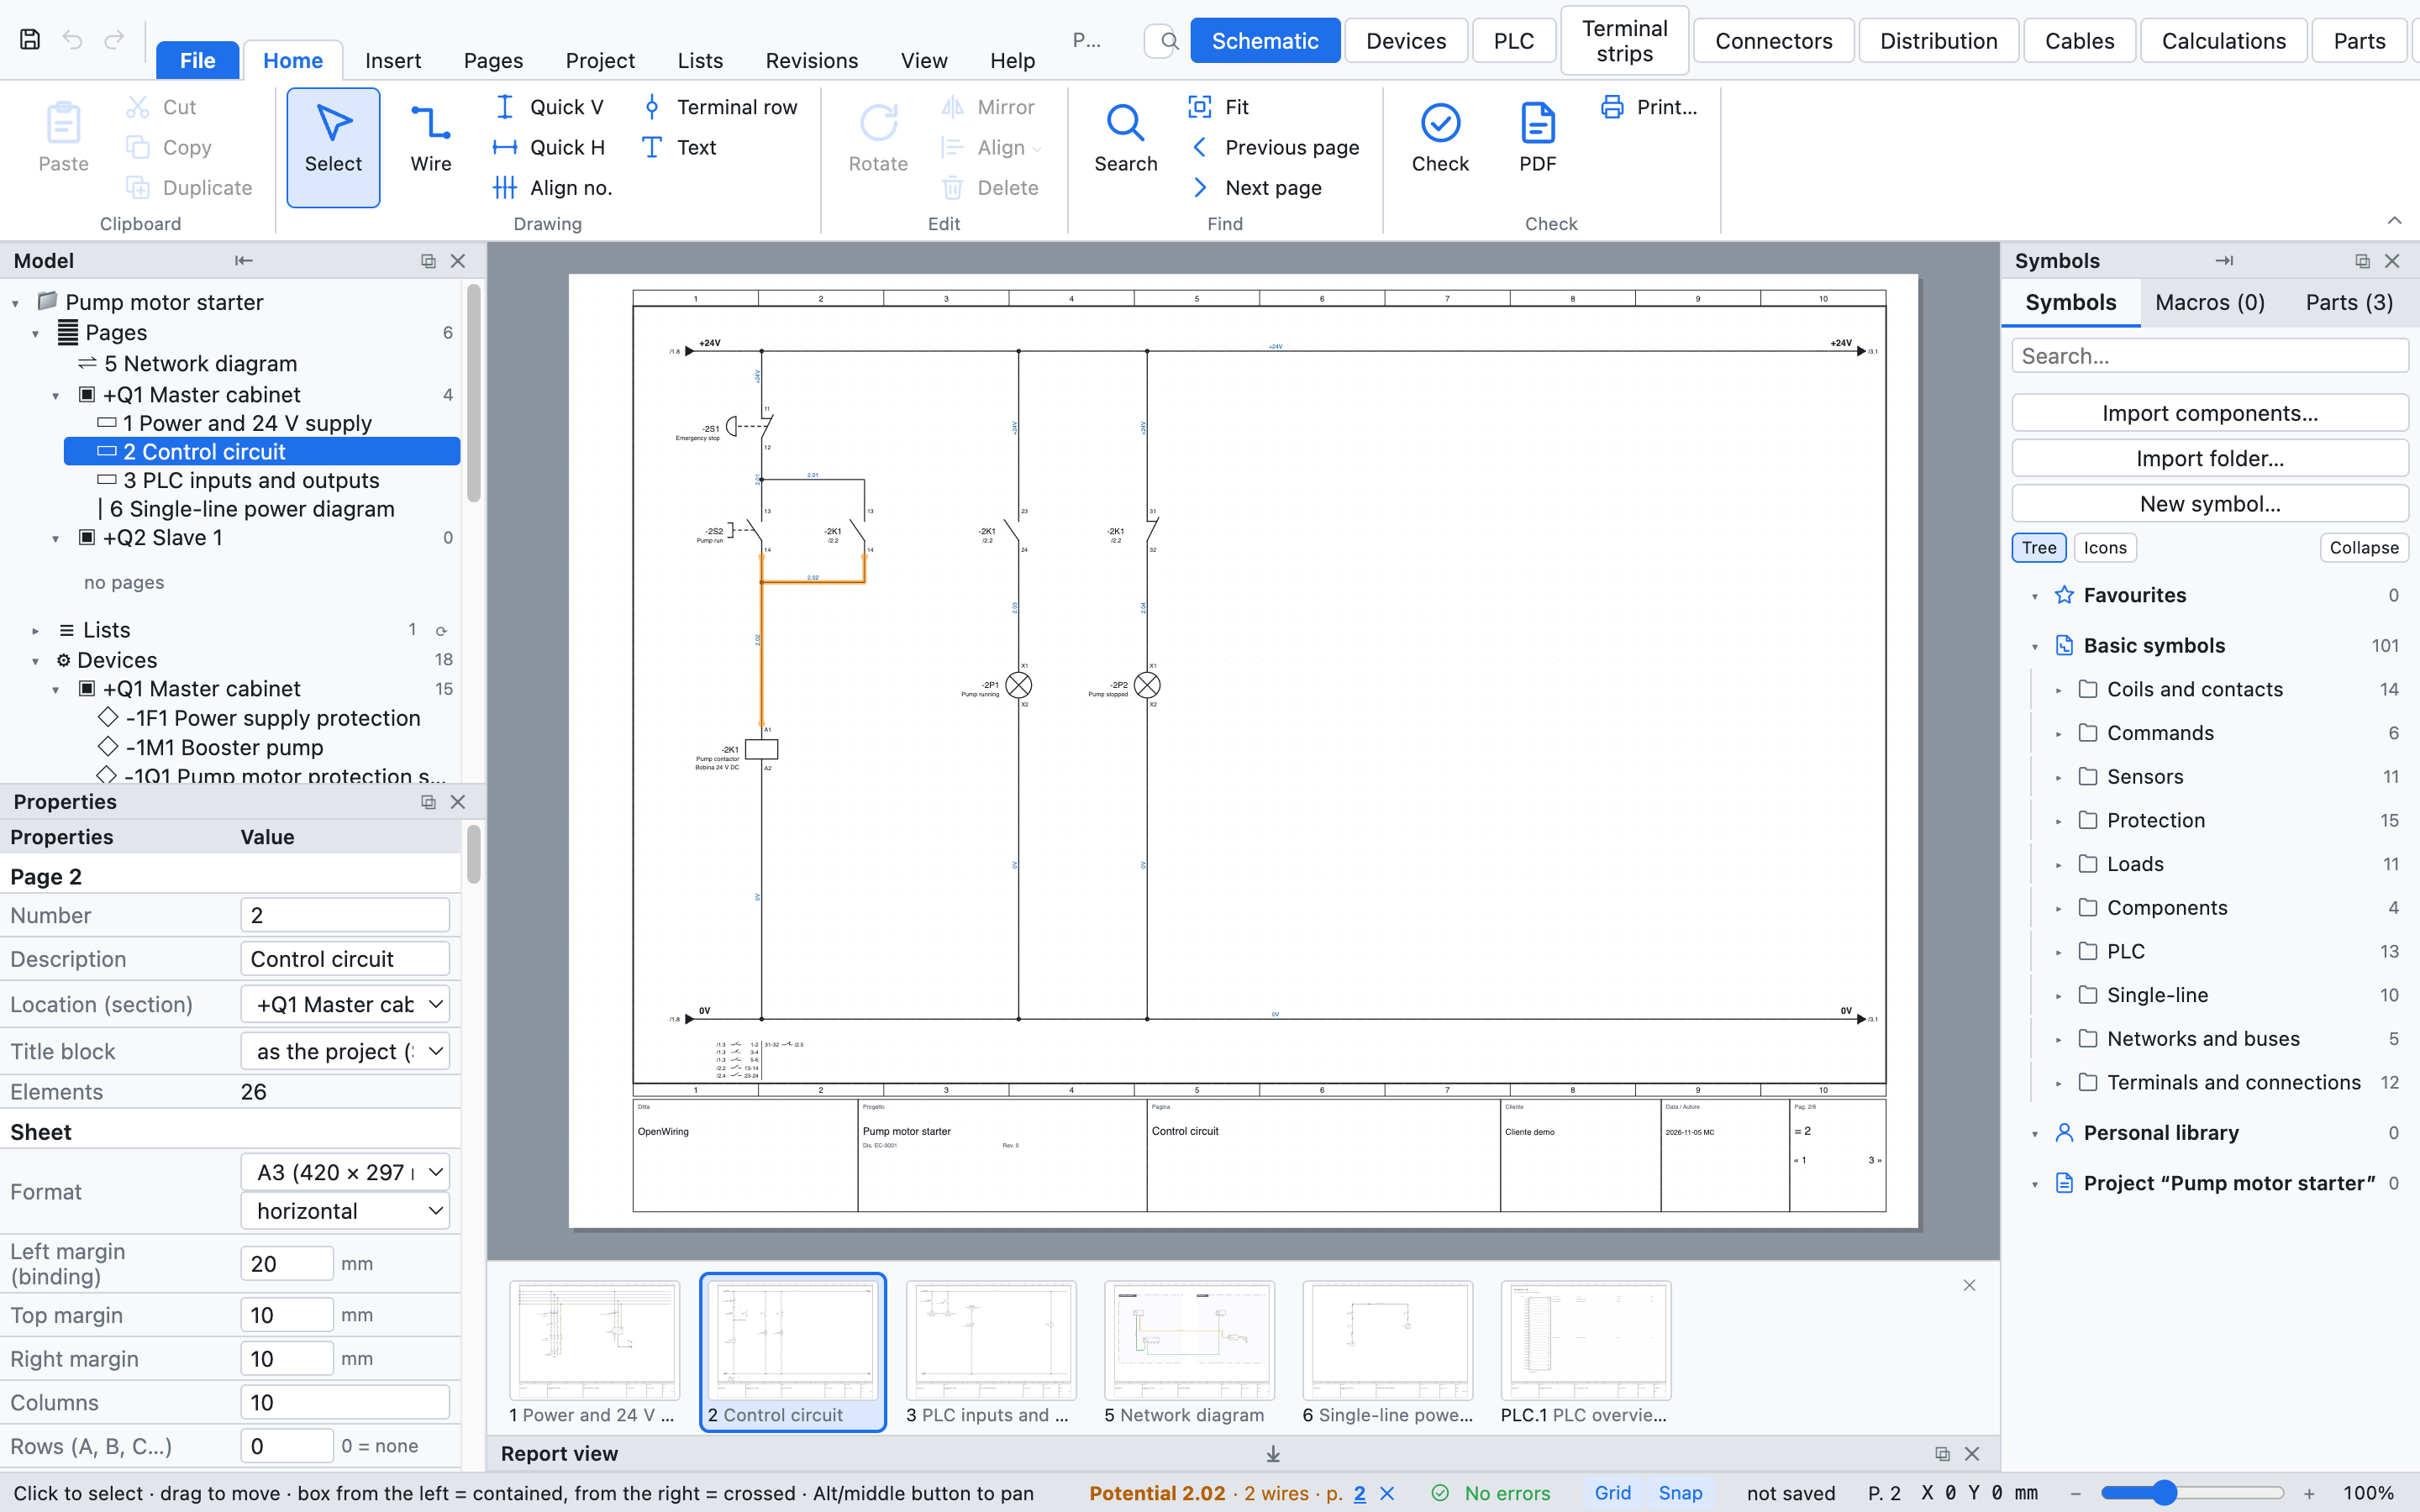
Conductor 2.02 highlighted in orange; the status bar at the bottom lists the pages where it appears.
- All connected conductors are coloured orange, also across interruption points, potentials and terminals.
- The status bar shows the name, the number of wires and the pages, which can be clicked.
- ✕ in the status bar, or Remove highlight, turns the highlight off.
Edit this page on GitHub · OpenWiring 2.0.6 · GPL-3.0